
Ikea Garage - Part 2

And now, the post you have all been waiting for ! How to install our IKEA Hack Garage Mudroom! Later this week, I will post the inside so you can see how I have it organized :)
Honestly, this is the easy part! (The hard part was cleaning and painting the floor).
Step One:
Assemble… Ahh what fun IKEA assembly can be. 4 items to assemble can take up a ton of time!
Step Two:
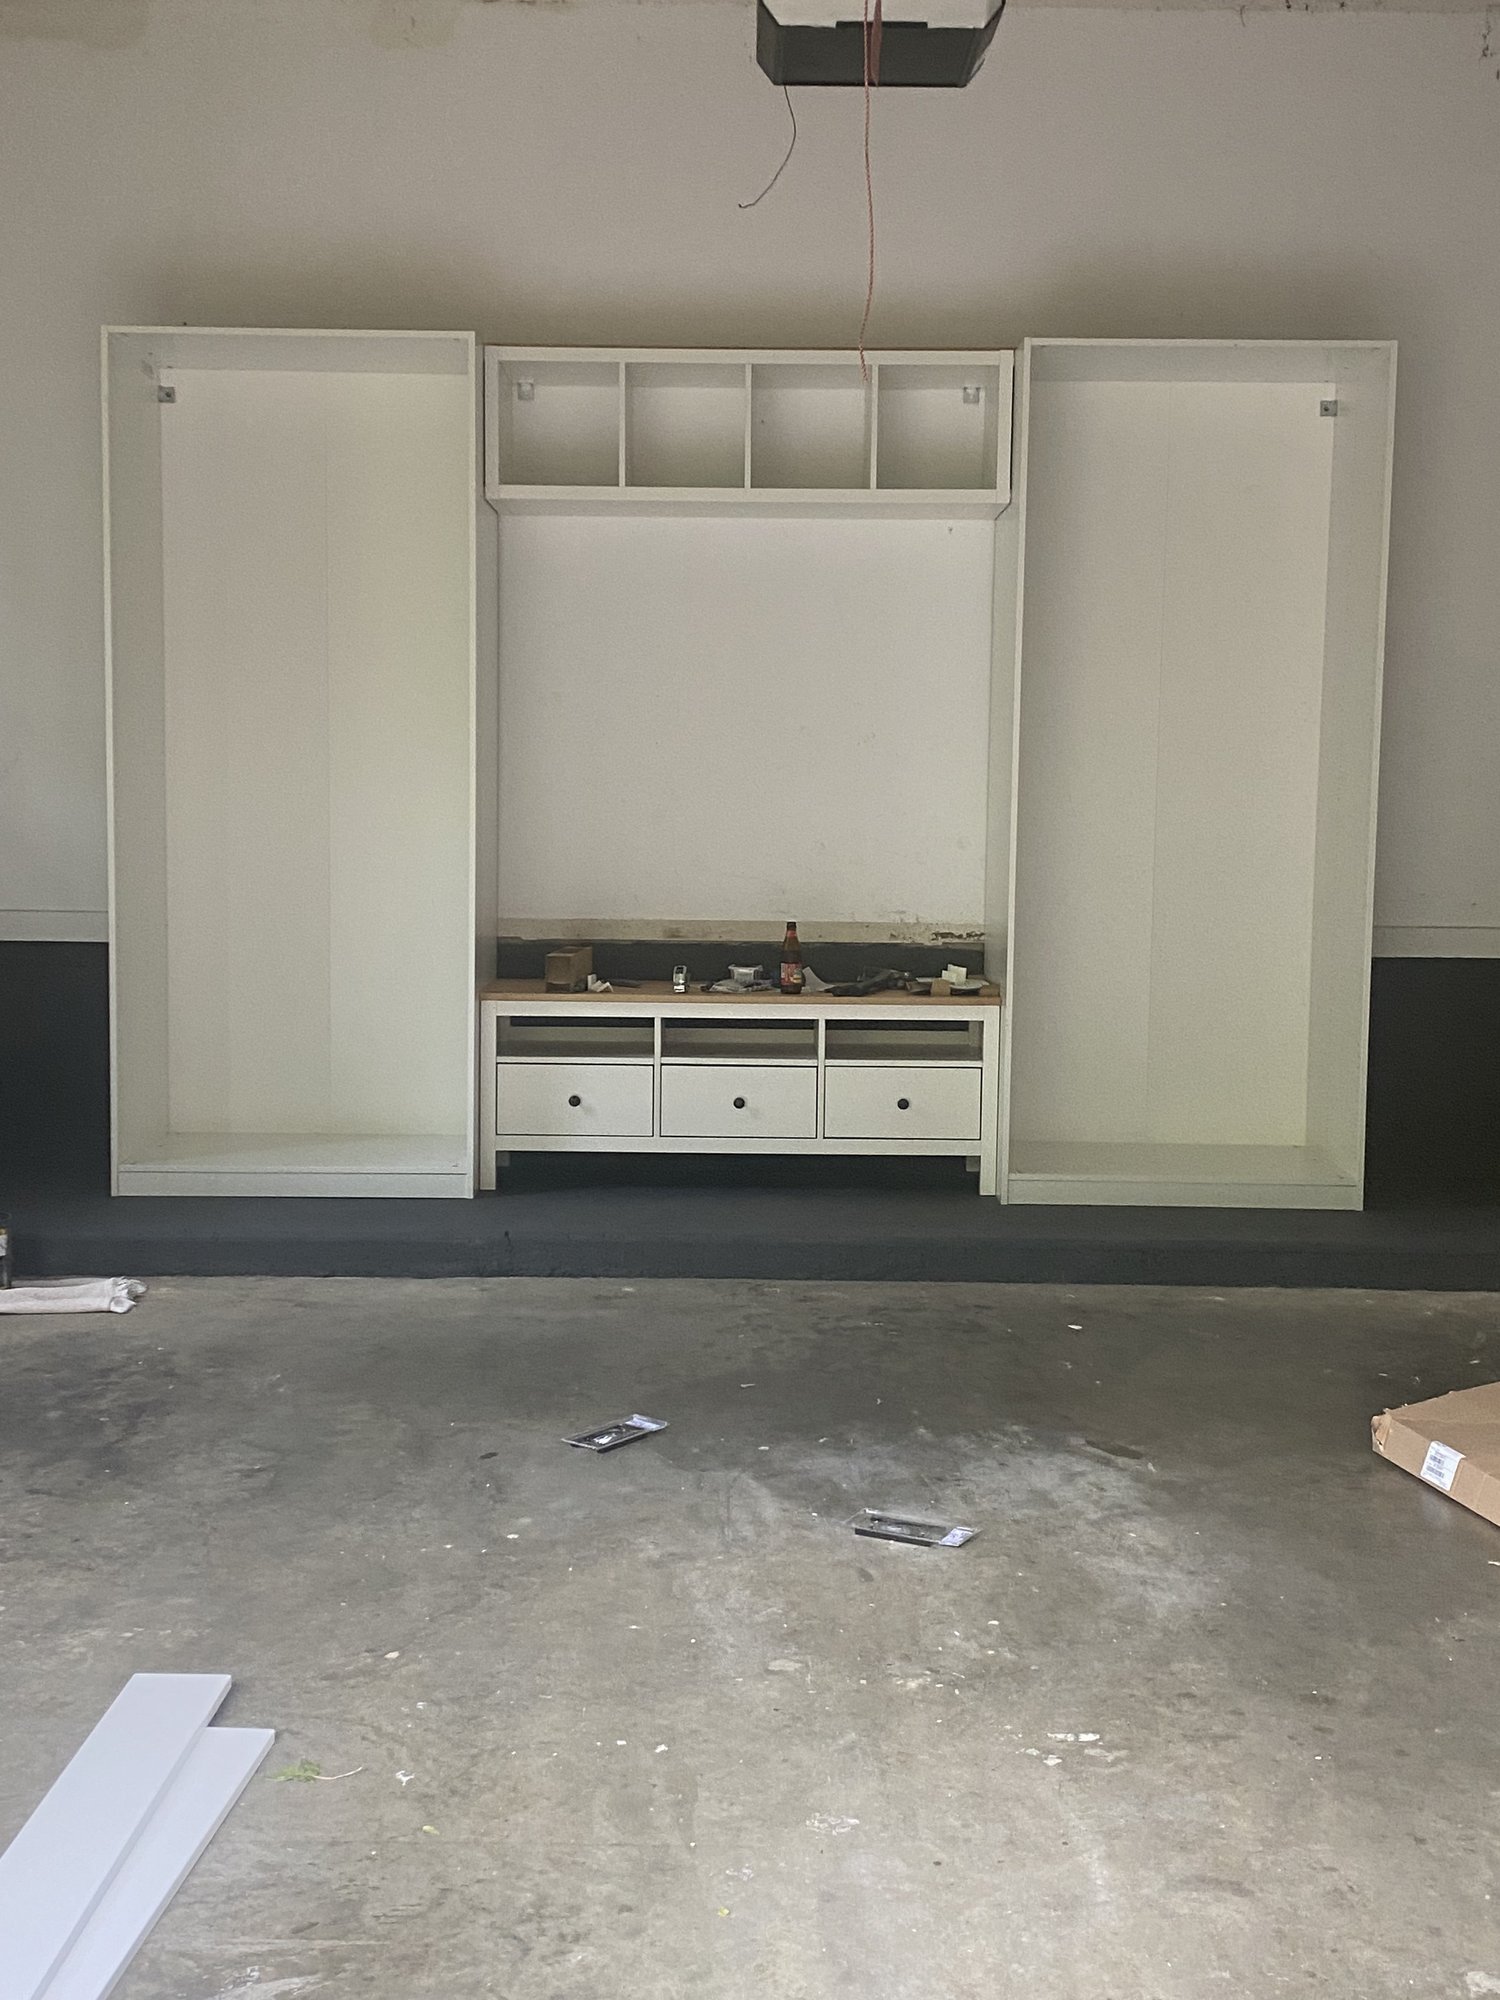
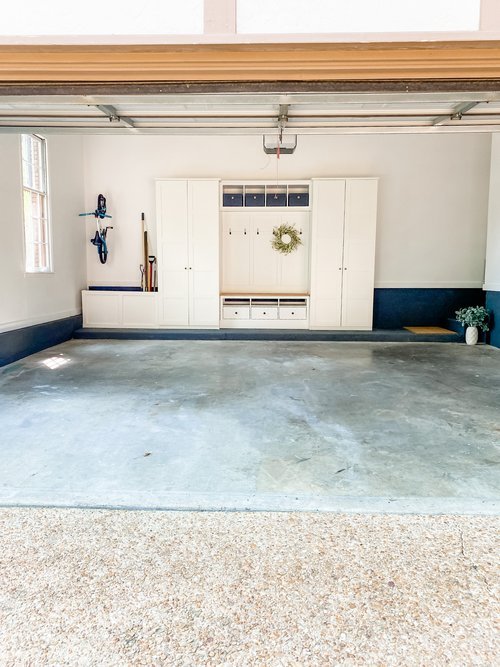
Find your center. Now, mine is not exactly center - I shifted it a little to the left to have a bit more room to walk down the stairs. So just play with placing your items where you think you want them, walk around a bit and move them as needed.
Step Three:
Now you’re going to mount your PAX wardrobes to the wall. IKEA should include what you need, but each corner of the top part of the bookcase will be mounted to your wall to avoid tipping over. Very important. You don’t want to skip this step!
Step Four:
Now i don’t have a photo of, but we also screwed the sides of the PAX wardrobes into the legs of the Hemnes TV unit. You can see the screws on the inside but we did this to ensure they unit acted as one cohesive piece.
Step Five:
Now you’re ready to mount the upper shelves. Watch my original TIkTok here to see how we used a 2x4 to help hang the shelves. Since we added upper trim, we also left the 2x4 attached. You can’t see it at all. You will also mount this to the wall.
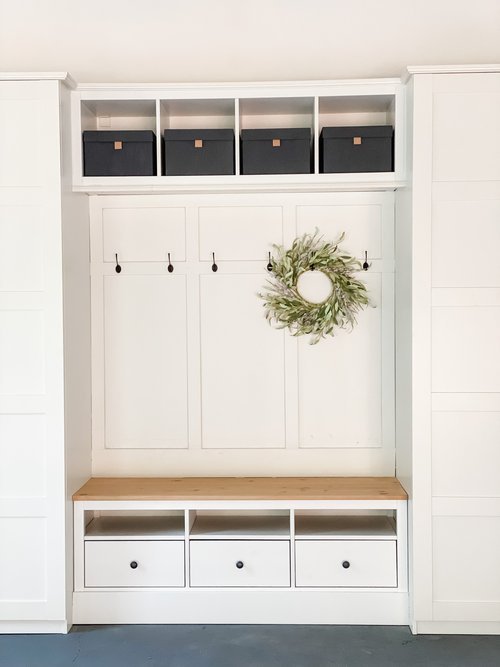
So here is what our system currently looks like..
Step 6:
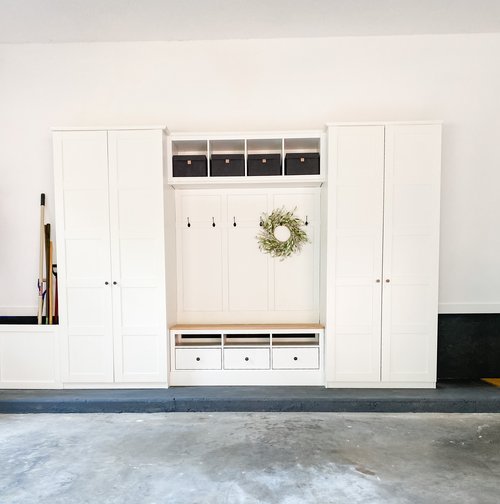
Finally time to customize! We added a piece of trim to the bottom (in front of the media stand legs) and let me tell you this trim MAKES it! This is just white board - I actually never even painted it and it looks totally fine!
For the back - we’re taking trim pieces (I used white as well) and then we are caulking at the creases. This trim is just nailed into the back drywall. Nothing fancy here friends!


Step 7:
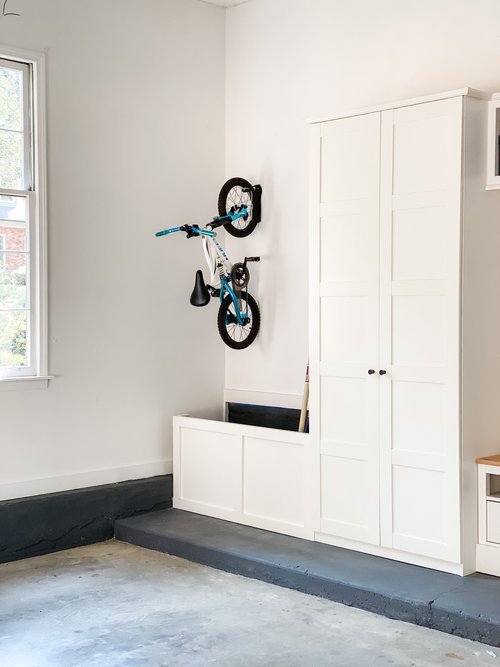
Now, we also built in a custom “rake holder” - for lack of a better word. It legit is just a bucket that hides rakes, shovels, etc. It has no functional purpose and to clean it, you’ll need a shop vac. But it is just a simple piece of plywood on a 2x4 stand. Let me know in comments if you want to see more about this construction and I can add a little bit. I just didnt think most people would use this feature but of course, I have no idea!
Step 8:
We paint! I painted the trim back and the ‘rake holder’ only. I used Alabaster from Sherwin Williams and it was a perfect match!
Step 9:
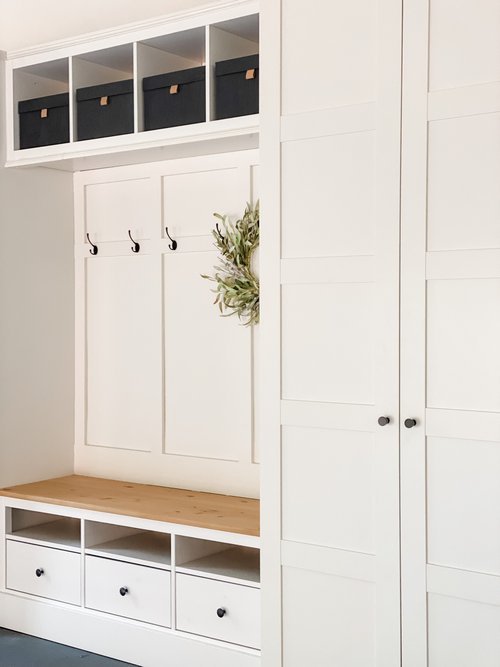
Ok now the next step does add a hundred dollars or so, which is why I am calling it optional. It’s the trim kits from IKEA built for their kitchen cabinets. I, personally, think it is more than worth it to add. But if you don’t want to that’s ok too! Notice that we put the trim along the entire top portion, as well as one strip under the kallax book shelf (top) shelves. Just cut the trim at a 45 degree angle to fit together. Maybe do some practice pieces first! ;) We then caulked the corners with white caulk and did the sides where the Kallax meets the PAX wardrobes to remove the space between and make it feel a bit more custom.

Step 10:
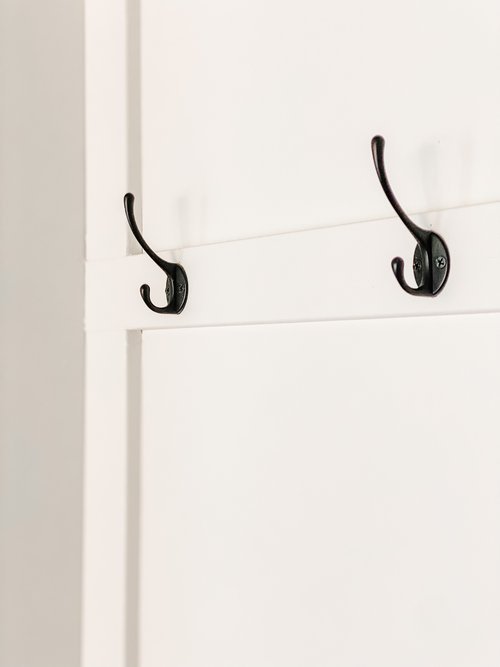
Final details! Added hooks from Amazon, Boxes are from Container Store, and the bike hook is from Amazon as well (comes in a pack of 2).
Thank you all so much for loving my IKEA Garage Hack and if you have any questions about anything in particular that I may have missed, please let me know!
xo,
Jackie